30 Day Drawing Challenge Day 11- Drawing Rounded Forms
Friedensreich Hundertwasser
Shapes can be difficult to form when they are rounded. Think about the folds of garments, facial contours, fruit, pitchers, petals, leaves…the list of rounded forms is long. I thought I would share a simple thought today that really helped me understand how to create rounded forms.
- Value Transitions are Crucial
- Gradual = Round
First let’s talk about value. What is it? This is a simple term that refers to light and dark and does not necessarily have anything to do with color. If something is dark value its obviously darker than whats around it. The opposite is true if something is lighter value. The degree of difference between adjacent values or “transition between values” is something called “value shift”.
To create a rounded contour, the “value shift” or transition between the values must be gradual.
Voila! It’s that simple.
- Whenever you want a rounded form, no matter what the color is, the value must change GRADUALLY. The rounder the form, the more subtle the value shift will be.
- A steeply rounded form will have quicker value shifts and a flatter rounded form will shift more slowly.
How easy is that?! Ok, now that we know about value shifts and rounded forms, this is your assignment:
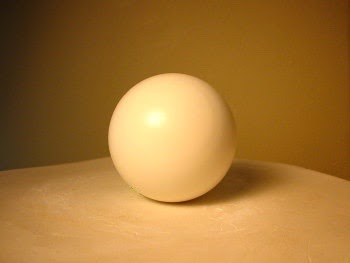
- Find something round to draw. I did this drawing of a sphere. You can use it if you’d like, but there’s plenty of rounded things in the world to draw. Use your imagination! Ideally drawing from life is great, but sometimes the lighting in a photograph can make things a bit easier. Setting up your own still life or using a photo will be fine for this lesson.
One final note or hint: At the edge of a rounded shape, there is an important shadow that you’ll need to find: It’s called the TERMINAL SHADOW and marks the receding edge of a rounded form. You’ll see it even along the brightly lit edge of a rounded form. If you look at my drawing, you’ll see it. In a relative way, the edge will be darker. Draw what you see, and you’ll be in good shape, but now that you know about terminal shadows, you’ll know to look for them. =-)
Materials I would suggest for this lesson:
Graphite soft lead pencil (2B, 4B, 6B)
White Paper
Plastic and kneaded eraser
Paper Drawing stump or tortillion (kleenex or finger can serve the same purpose)
Step 1- You may begin with a toned ground if you think it might be helpful. As we saw in previous lessons, this can provide a shortcut to the middle values. However, you may approach it any way you’d like.
Step 2- Find your highlight(s). Begin by making the highlight your lightest value and let everything relate to that value as you move along. Value is relative, so for the purposes of this lesson, work on white paper.
Step 3- Mind the transitions of value and note the terminal shadows at the receding edges of your rounded forms. Where they disappear and round away out of sight, you will do well to include a terminal shadow, even if you don’t really see one. 😉
Enjoy this drawing time and know that you’re not alone in taking on this challenge. I look forward to connecting with as many of you as possible in June when my classes resume. It will be fun to compare notes and share thoughts on this experience!
In the meantime, check out a few of the great drawings your fellow challengers are sharing:
Rebecca Zdybel
Spread Light, Share Love, DO Art!
Feel free to share any of this blog post on your own blog or website, but I ask that you you include:


Love your drawing challenge!