
“As practice makes perfect, I cannot but make progress; each drawing one makes, each study one paints, is a step forward.” Vincent van Gogh
 |
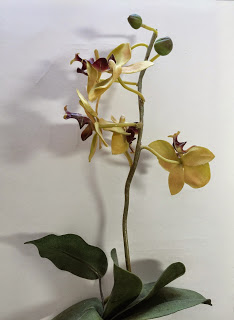
| My subject for today-orchids |
Vincent Van Gogh wrote a lot of letters to his brother Theo. They chronicled his journey as an artist and often indicated that this talented artist struggled with his methods and approaches …think about it! It didn’t come easy. His work now sells for hundreds of millions of dollars, and yet he was digging deep and noting that each new drawing, each new painting helped him see personal progress. He was special, but I don’t think what he went through is unusual. I’m sure that your commitment to this challenge will also pay off when you complete this 30 days.
Up till now in our 30 Day Challenge, we have been concentrating on Line drawings. These are important, but today I want to talk about shading and shadows. Shadows breathe life into a drawing. Lines can be interesting and form the skeleton of a drawing, but shadows provide the muscle and bring vitality to the simplest sketch.
Today I’m going to show you an easy way to give a sense of shadow and light to your drawings.
What you’ll need:
A pencil or graphite stick with 2B, 4B, or 6B lead (a soft pencil like a carpenter’s pencil will also work)
a drawing stump/tortillion, or any of the following: kleenex, your finger (I presume you may have a couple of those) or paper towel
good plastic eraser or kneaded eraser
drawing paper
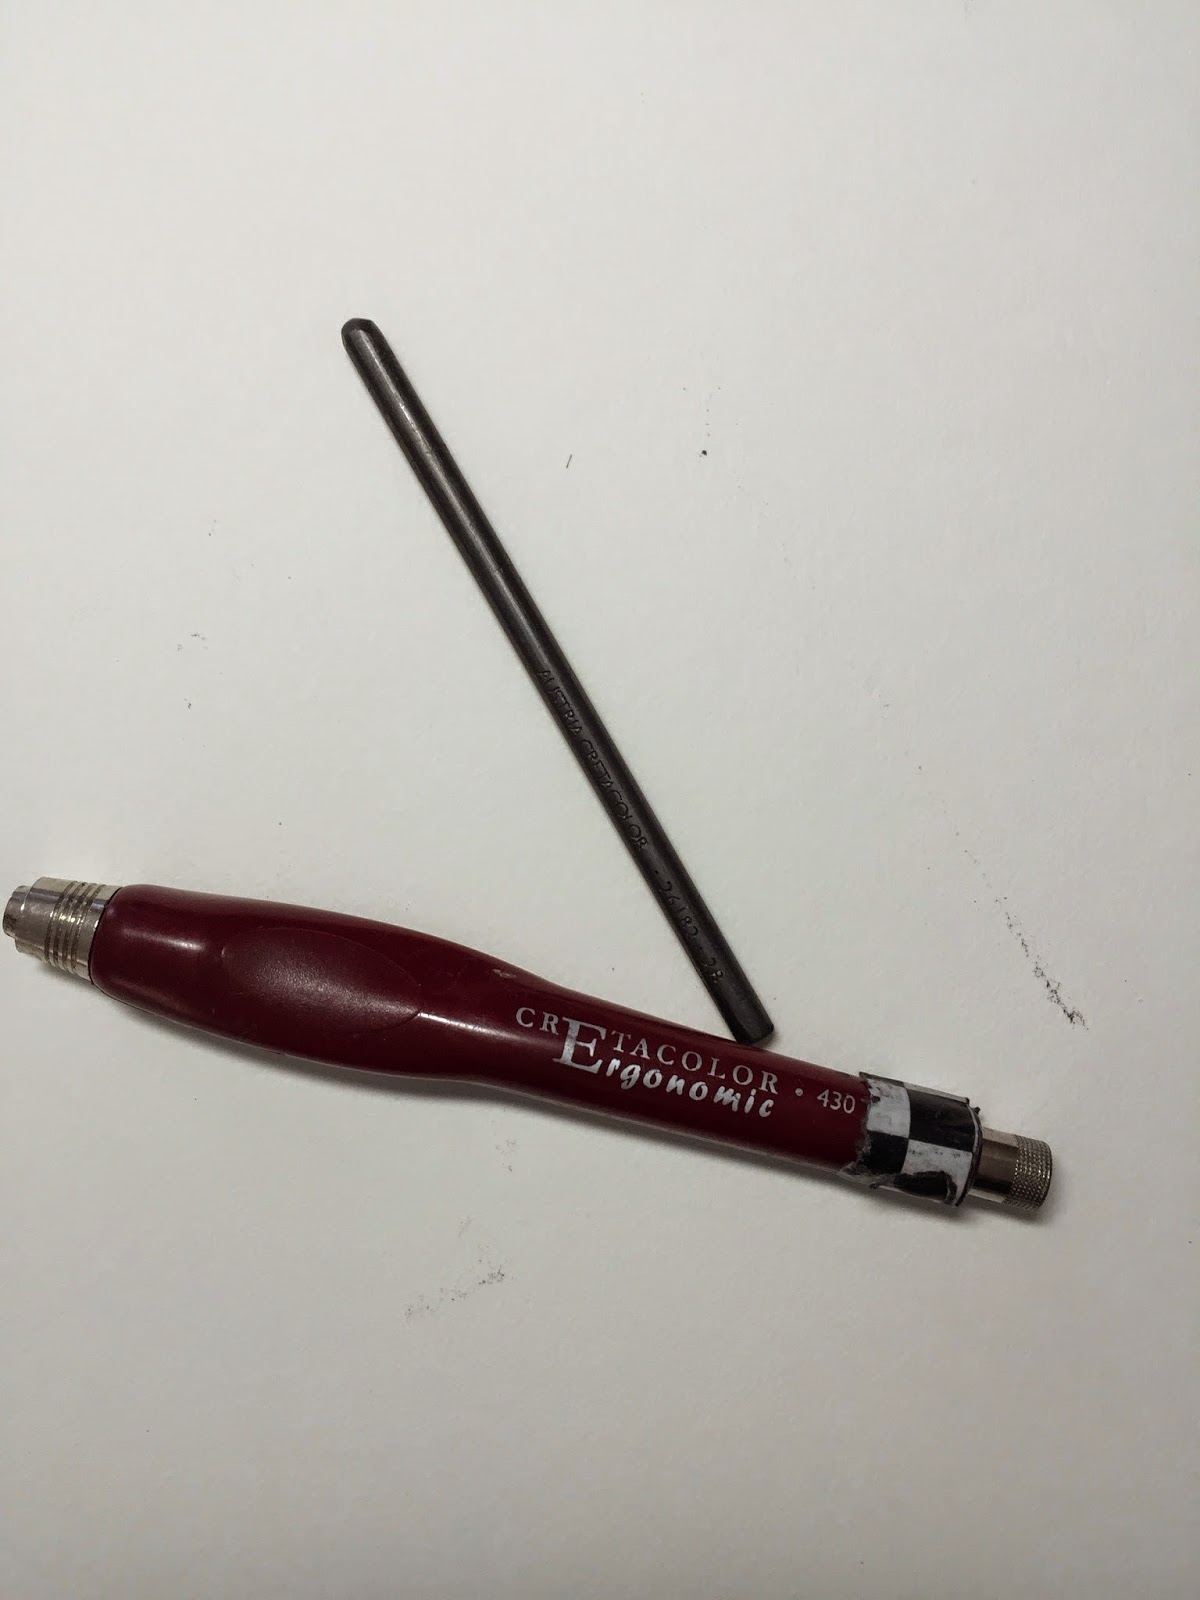
Here is a photo of my favorite drawing pencil for value sketches. It’s a Cretacolor Ergonomic pencil with a 6B lead.
Note: “B” type lead is soft. Higher numbers mean the lead is softer.
Step 1. Take your paper and draw a rectangle the size you would like for your drawing to be. Then place your paper on a smooth surface (if you do this on a textured surface, then texture will show). If you have craft foam or a stack of newspapers or magazine, it may help to put your paper on that. A sketchbook will do very nicely. Turn your pencil lead on it’s side and try to smear graphite all over the surface of the rectangle on your paper without making a lot of lines, just smear the graphite on without digging into the paper.
Step 2. Take your drawing stump/tortillion, kleenex, paper towel or your finger and smear the graphite around within the rectangle to make a smooth uniform coat of graphite on the surface. It should smear easily and right away. If it doesn’t then, try another pencil with a softer lead. When you have filled in the rectangle with a uniform coat of graphite, you will have what is known as a “toned ground” ready for your drawing. It will look something like this.
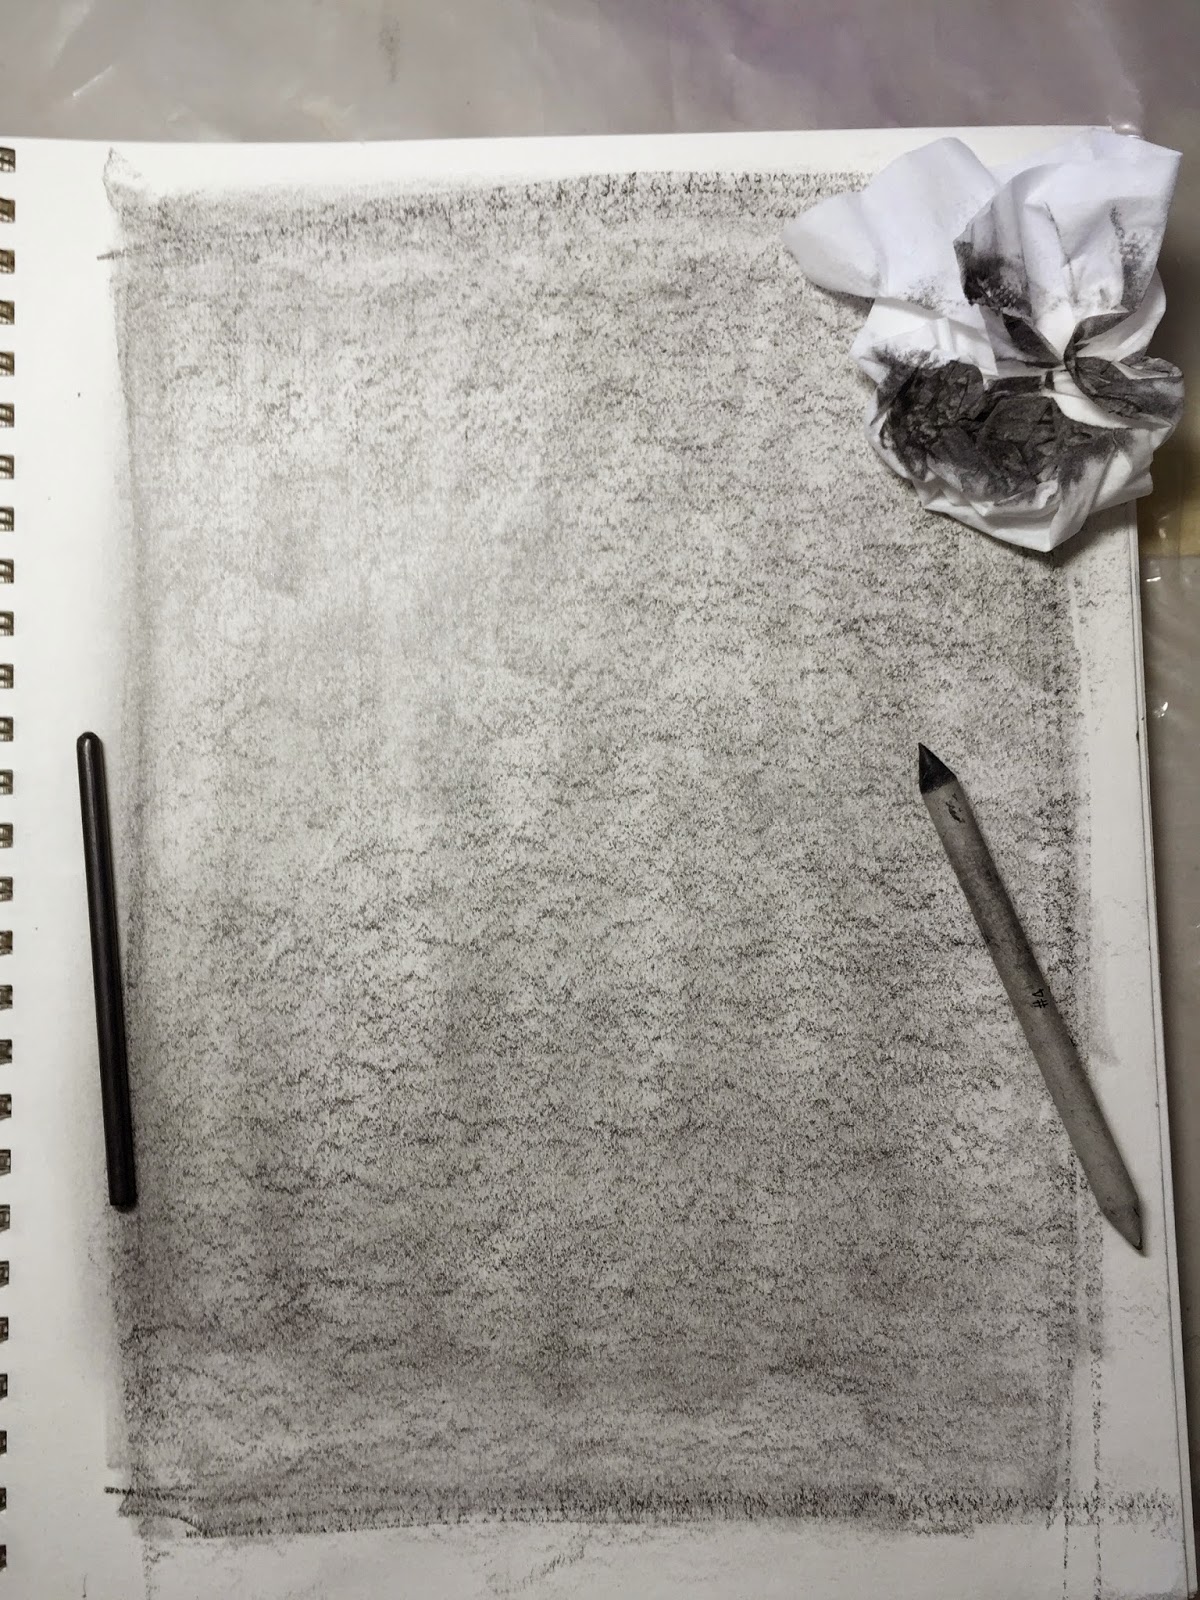 |
| Toned Ground- here is my sketchbook with my 6B graphite lead on its side to the left. It’s so wide that I don’t have to make many marks to cover the page. My drawing stump or tortillion is on the right along with a kleenex which is also a good thing to use to smear the graphite around. |
Step 3. Now take a flower or some kind of object you have sitting around the house and feel like drawing. I took a plastic orchid arrangement. Draw your contour lines right over the prepared toned ground. This will become your middle or light value. What’s so great about his surface is the ability to make corrections. If you goof and something isn’t right, just erase it and smear a little more graphite into the area you are correcting. Then draw it again. Repeat as necessary. Once you have your sketch on the paper it may look something like this. It doesn’t have to be complicated…just pick something easy for this first time. (unlike me! In fact, after doing this exercise, you can use my orchid photo, but I might suggest a simpler flower or if you’re not experienced at drawing. Try something easy like your spray bottle or a salt shaker.)
Step 4. Now look for dark values, or shadows. Take your graphite pencil and lay those darker places in. Where you see light shapes, you can erase. Work your way through your drawing and add darks or erase as needed. This forgiving surface is a great way to jump start the path to creating a sense of light and dark.
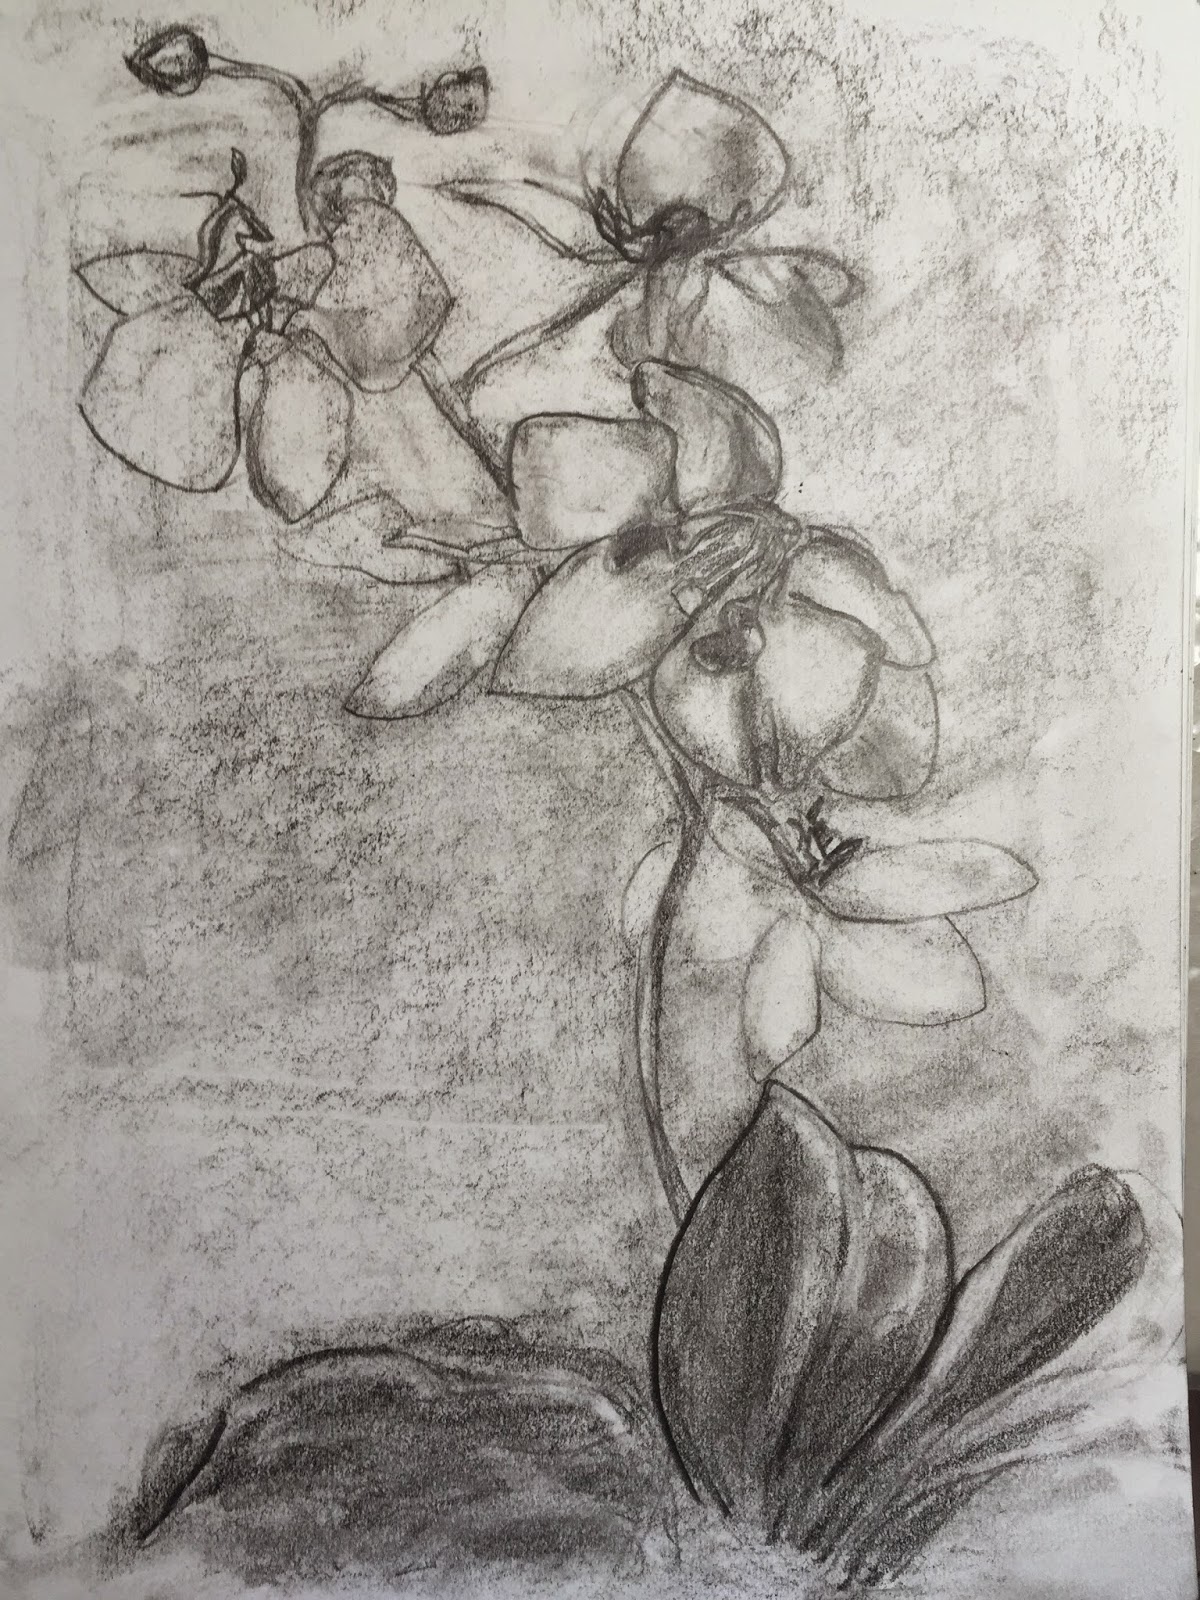 |
| Looking at this photo of my sketch, I realize I have not captured the shadows in the back behind the plant. Since this surface is so forgiving, I will simply lift out the light areas and leave the shadows… |
 |
| Contour drawing on toned ground, with additional darks and lifted lights using an eraser. |
Step 5. When you’re done, take a look, take a photo, and feel free to smile when you see how great it looks. Smile extra big when you think about the cool new technique you just learned. Once you get to smiling, maybe send the picture to me! Here are some drawings from those of you who have shared…


Looking good! I’d love to see more, and I will keep them anonymous. Sharing the journey with others is fun. I will try to share more of these photos as I receive them.
Tomorrow its time to do something with a photo of your choosing. You may have one lying around that you’d like to draw. Look around and find that photo…Tomorrow will be the day!
Happy Drawing!
Rebecca Zdybel
Spread Light, Share Love, DO Art!
Feel free to share any of this blog post on your own blog or website, but I ask that you you include:
Good morning Rebecca!
I am loving the 30 day challenge, and how its getting me to draw more. The exercises remind me of a book I went thru over 25 yrs ago; "Drawing from the Right Side of the Brain", and I still have those drawings! The exercises really do help to massively improve your drawing skills.
I got a little carried away yesterday with the shell vignette you posted, and pretty much did a finished sketch. If I can ever figure out how to post to you, I will! (I'm an art geek, not a tech geek!!)
Have a blessed day! Deborah
Good morning Deborah the book you mentioned is one of my favorites as well. Drawing on the Right Side of the Brain by Betty Edwards has recently been revised and I think it's new and improved version is even better than the original! thank you for sending me the photo of your drawing…you did a fantastic job and I will include it in a future post. Thanks for your comment!