
30 Day Drawing Challenge Day 8- Photo reference on Toned Ground
“Drawing is the root of everything, and the time spent on that is actually all profit.”—Vincent van Gogh, The Hague, 3 June 3, 1883, to Theo van Gogh
 |
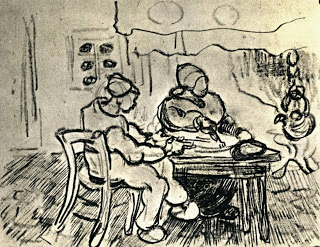
| Interior of a Farm with Two Figures March-April 1890, Saint-Rémy Lead pencil, 254 x 330 mm. Rijksmuseum Vincent van Gogh, Amsterdam |
This time, we will draw from a photo reference of our own choosing. It’s open season! Here’s what you’ll need:
a drawing stump, tortillion, your finger (I presume you may have a couple of those) or paper towel
good plastic eraser or kneaded eraser
drawing paper
Your photo reference.
Step 1. Take your paper and draw a rectangle the size you would like for your drawing to be. Then place your paper on a smooth surface (if you do this on a textured surface, then texture will show). If you have craft foam or a stack of newspapers or magazine, it may help to put your paper on that. A sketchbook will do very nicely. Turn your pencil lead on it’s side and try to smear graphite all over the surface of the rectangle on your paper without making a lot of lines, just smear the graphite on without digging into the paper.
Step 2. Take your drawing stump/tortillion, kleenex, paper towel or your finger and smear the graphite around within the rectangle to make a smooth uniform coat of graphite on the surface. It should smear easily and right away. If it doesn’t then, try another pencil with a softer lead. When you have filled in the rectangle with a uniform coat of graphite, you will have what is known as a “toned ground” ready for your drawing. It will look something like this.
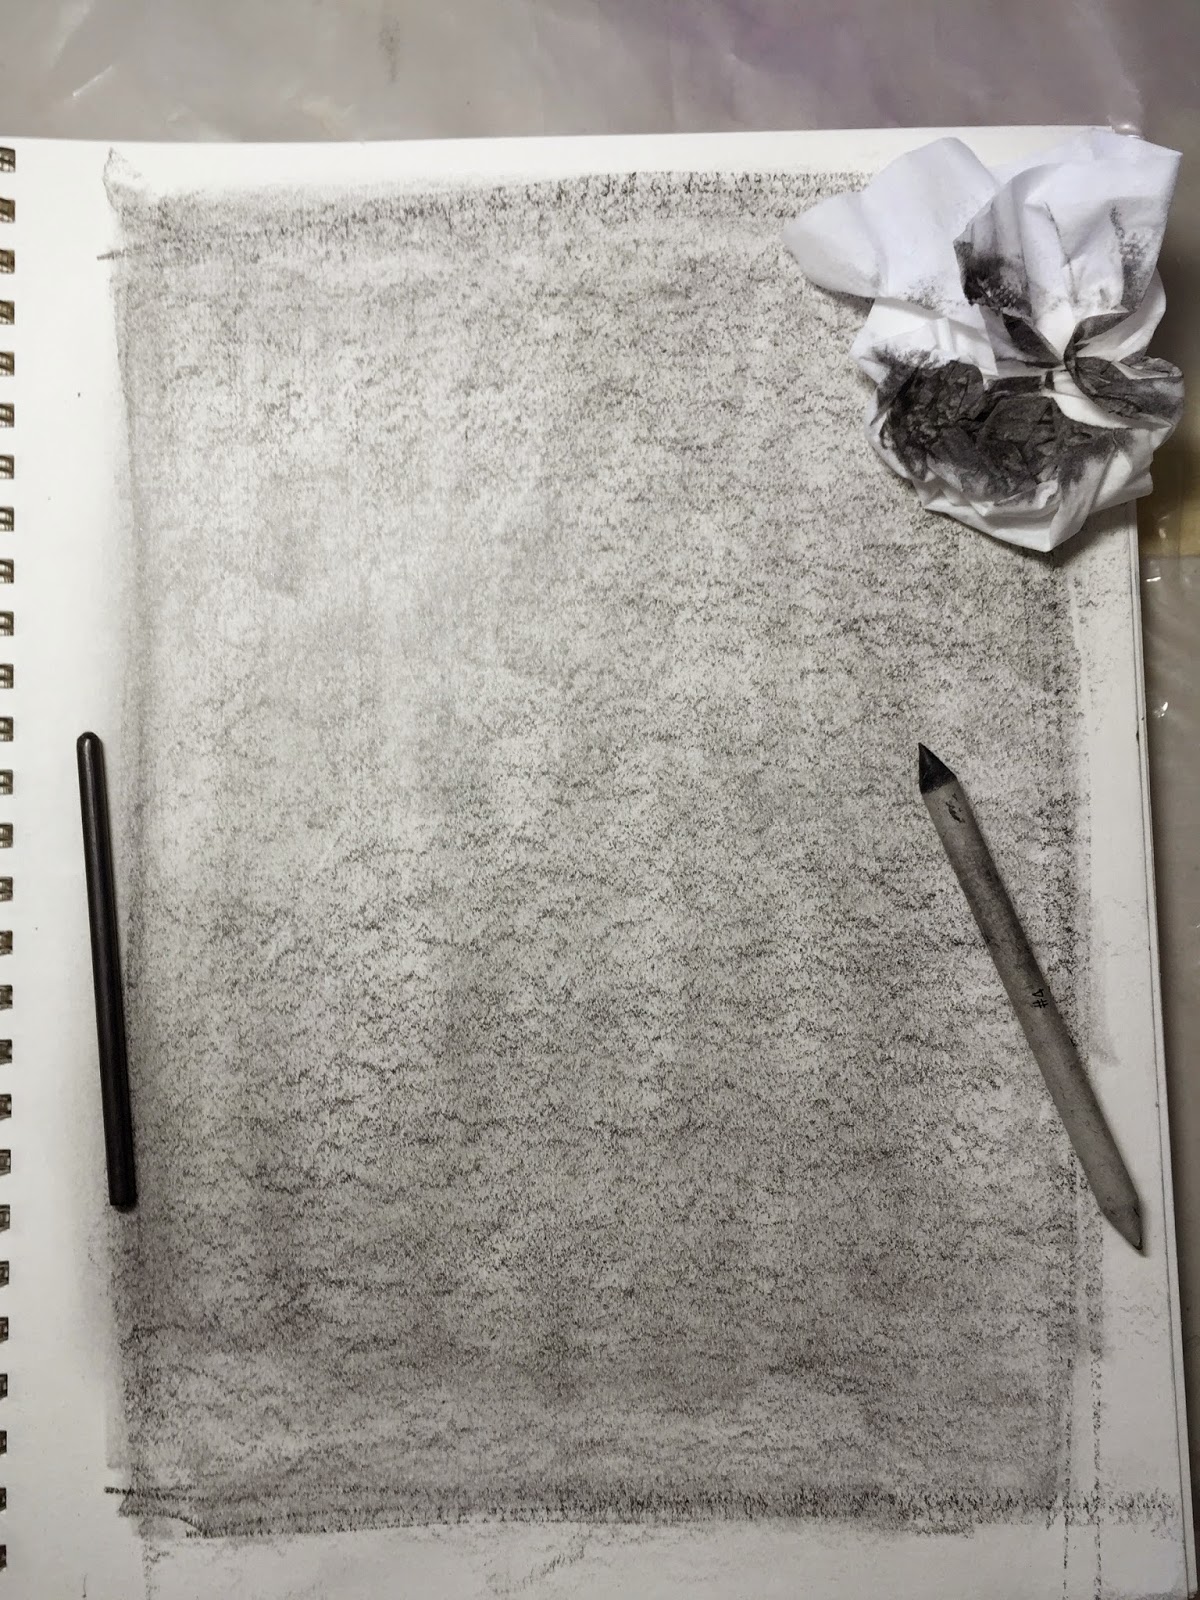 |
| Toned Ground- here is my sketchbook with my 6B graphite lead on its side to the left. It’s so wide that I don’t have to make many marks to cover the page. My drawing stump or tortillion is on the right along with a kleenex which is also a good thing to use to smear the graphite around. |
Step 3. Now take your photo reference and draw your contour lines right into the toned surface. This will become your middle or light value. What’s so great about his surface is the ability to make corrections. If you goof and something isn’t right, just erase it and smear a little more graphite into the area you are correcting. Then draw it again. Repeat as necessary. It doesn’t have to be complicated…just pick something you are interested in.
Step 4. Now look for dark values, or shadows. Take your graphite pencil and lay those darker values in. Where you see light shapes, you can erase. Work your way through your drawing and add darks or erase as needed. This forgiving surface is a great way to jump start the path to creating a sense of light and dark.
|
|
| The Bell tower at San Fedele in Tuscany where we will be staying on my EAT PAINT COOK TOUR of TUSCANY this Oct. 3-10, 2015. There’s still room if you’d like to join us 😉 |
.jpg)
 |
| I changed the angle from my photo reference so I can show the bells peeking out of the tower. Now the angles need a bit of adjustment to correct the perspective. It will be easy to erase and make the changes on the toned ground. |
Step 5. When you’re done, take a look, take a photo, and feel free to smile when you see how great it looks.
If you haven’t purchased your black Elegant Writer pen yet, then run out and get one. I’d like to use it for Day 11’s lesson. Here’s a link to Amazon: Elegant writer- Black extra fine point

Spread Light, Share Love, DO Art!
Feel free to share any of this blog post on your own blog or website, but I ask that you you include:
Recent Comments