
How to determine what to draw first? Finding Edges is key. My initial step for almost every drawing is to look for edges. One way to sensitize our eyes and see the edges is to really look for them. Minding the edge of our shapes is what we will be taking care to do as we take our first few steps of this drawing challenge with contour line drawing…perhaps this guy should have had a few lessons of this sort before he stepped out!
Day 2 Drawing Challenge Assignment: Contour Line Drawing
Part A: Draw a Continuous line Contour drawing of an object you love.
How to Make a Continuous Line Contour Drawing:
A Continuous Line Contour drawing is simply an outline of the edges of your item done with a line that is continuous. It makes sense right? Avoid sketchy line work. Make a confident line…even if it’s wrong it the appearance of confidence will make it look artistic.
What to draw? Maybe it’s your cup of coffee in the morning. Maybe it’s a small item you have on the shelf. Just make it something you have feelings about…preferably something with a little story. Choose your object, whether its your paint brush or your favorite pair of glasses, and draw the edges of it’s contours using a continuous line.
Be sure to draw it on a new sheet of paper (not on the back of your last drawing!!!)
This is my best hint for success: Draw VERY SLOWLY. Try to make your pen move at the same speed as your eyes. (yes I want you to use a pen again!) Don’t get ahead of your pen with your eyes…keep looking at the place you are currently drawing. When you stop looking at your object to look at your paper, be sure to STOP your pen. All too often we quit looking, move ahead with our pens, and start making things up. When I do this, invariably I make an inaccurate mark. Only draw when you are looking at your object. Move around the edges and note where other edges intersect.
Once you have chosen your object- Carefully and SLOWLY draw it in the top ½ of your piece of paper. (we will save the bottom half for part B)
Draw it with your eyes concentrated on the thing you are drawing and NOT looking as much at the drawing on your paper. Make yourself look at the thing you draw 90% of the time and at your paper as little as possible. Try not to pick up your pen. If you make a wrong turn, then make another line that is more correct. Those wrong turns will probably not be as obvious when the right lines come along.
 See more-DRAW! |
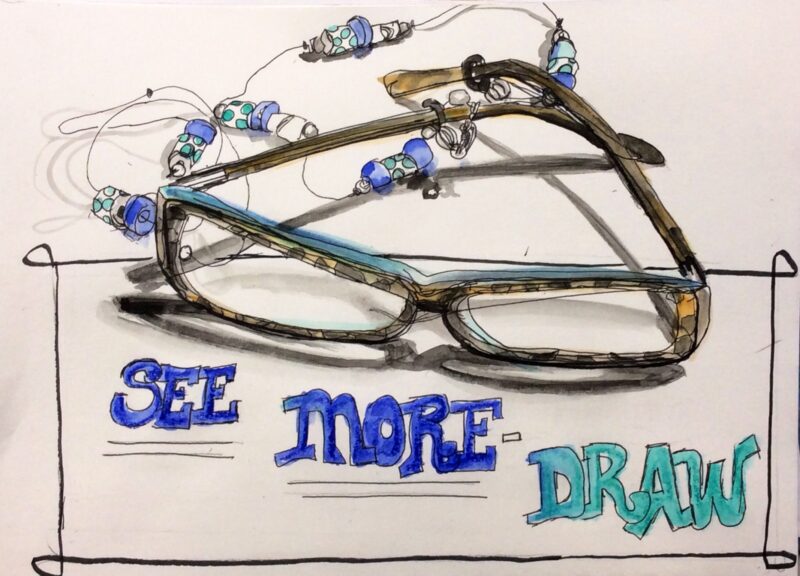
| I tried to create a continuous line as I made this contour drawing in permanent pen. Here and there I went wrong, but just pick up your pen and start again if that happens. If you look closely you’ll see a line underneath the top of the right lens. This is a line that was drawn at an incorrect angle as I was looking at my glasses. When I realized the error, I just picked up my pen and drew a new line. Do you see how unimportant the incorrect line is once the finished drawing is complete? So don’t be scared! Mistakes are not fatal. |
Your drawing will not look perfect, but it will have character and be what I’d call Arty-farty. A perfect drawing might be accurate, but can be dull. Contour Drawings are never dull, often I find that Arty Farty renderings are more fun to look at. The inaccuracies lend a sense of the artist’s hand to the final product.
Part B:
Create an intersecting frame for your object. Have the frame descend below the drawing and either write an explanation of what makes that object so important, or use a few words to help your object tell a story. I decided to let my glasses illustrate the idea of the subject for this lesson.
If you want to add color, you can do so with watercolor or colored pencils. (I added color with watercolor).
If you’re enjoying this drawing challenge, be sure to subscribe to this blog! You can share it to your Facebook friends if you want to encourage others to join us. I’ll see here tomorrow with another idea for you!
With love and light,
![]()
Recent Comments