

Drawing challenge Day 3-Blind Contour Onion
Willem de Kooning
Day 3 of our drawing challenge will challenge us to draw without watching our paper. What?! I can hear you already…”you want me to draw without looking at my paper?!” As it turns out, in order to truly see and improve our drawing, this technique has proven results. For now, just trust me when I say that it is worth your time to try it. Blind Contour might be one of you greatest growing tools!
What will we be drawing? The lowly onion will be our subject for today. Blind Contour will be our approach. Relax…you won’t need a blindfold.
Materials:
An Onion, Sketch paper, a pencil, and eraser (yes you can use one today!). I’m drawing my images in my Aquabee Super Deluxe sketchbook and I’d suggest you do your series of drawings in a sketchbook. It will provide a great record of this 30 day adventure once we are finished. =)

Step 1 of our Drawing Challenge:
Take a look at your onion. I’d like you to draw from life if possible, so try to find an onion and place it in front of you. If not then use this photo.
Turn your paper to landscape orientation. We will begin along the left side of the paper. Very important: Turn your body away from your paper. Look at the onion, but try not to see the paper you are drawing on.
Step 2 of our Drawing Challenge:
Beginning on the left side of the paper: Find an edge on the left of the onion, and begin moving your eyes and hand together to draw the edge of the shapes you see. Be sure to turn away so you can’t see the paper. Peeking is allowed, but only to replace your pencil if it goes astray.
Follow those edges slowly with your eyes. Your pencil should move with your eyes. This is a slow process, so don’t move your eyes ahead of your pencil. Feel your pencil move. Do not erase. If your line is crazy, simply pick up your pencil, replace it along the edge where it “went wrong” and draw it correctly. The secret is to look at your subject 90% of the time and at your paper less than 10% if at all possibly. The onion may have lots of edges…the skin may be torn, the top may be gnarled, and the bottom may have root tendrils. All these edges are meant to be explored and followed with your eyes and your pencil.
What does this accomplish? It makes a confident line. It will reveal nuances of detail which you would not see otherwise. Your drawing may end up looking something like this:
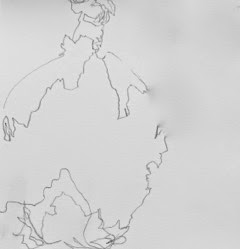 |
| Though far from perfect, this drawing has captured the torn quality of the edges on the papery outer shell of the onion. |
If that’s all the time you have for today, then Congratulations! You’ve completed another drawing in our 30 Day Drawing Challenge!
If you’re a glutton for punishment or hungry to learn as much as possible, then follow along to Step 3. It’s time to do it again!
______________________________________________________
Step 3 of our Drawing Challenge- Reposition your onion and draw it again. Use the same Blind contour technique and beginning in the central portion of your paper, draw the onion again. Remember, SLOW is key. Fight the urge to speed up and make something up. When my eyes get ahead of my hand, that’s what happens. More often than not, when I make things up, they often are wrong!
Since we are drawing more than one onion, shapes may overlap. Your pencil may go off the paper. Don’t worry! Enjoy the process and if you’re like me, you will find more and more detail becoming apparent to you as you slow down to take it in.
When the second drawing is done, you again have permission to stop. However, if you want to complete the entire lesson, then one more onion drawing is required.
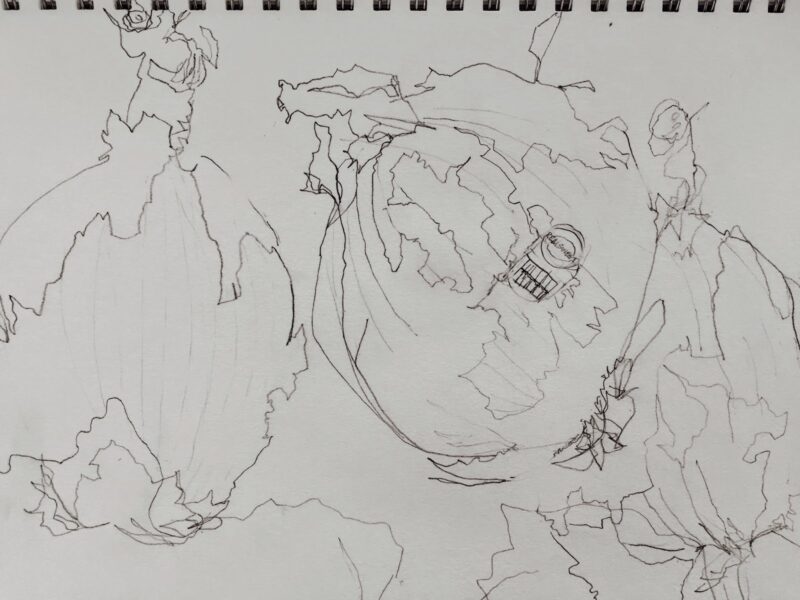
Step 4 of our Drawing Challenge: Reposition your onion again. Beginning on the right side of the paper, find a good edge and draw your object slowly with your eyes and hand moving in concert. When you’re done you may have a drawing that looks like this:
If you’re enjoying this drawing challenge, be sure to subscribe to this blog! You can share it to your Facebook friends if you want to encourage others to join us. I’ll see here tomorrow with another idea for you!
With love and light,
![]()
Recent Comments